Recently I’ve been doing a lot of work in Office 365 for a client, and I must admit I’m loving it. No more fuzzing about with installations of Service Applications, or going in to IIS to see why the site isn’t performing the way it should – all of that stuff is managed by Microsoft for you. However, that also comes with a big ‘but’: forced updates.
Let me explain. In Office 365 updates are going to happen whether you like it or not. That’s all fine, and usually a great thing because it means you get all the new and shiny stuff quickly, while those with on-premises installations have to wait for a SP or even a next release. Microsoft introduced the ‘First Release’ feature which allows you to receive these new updates for a particular user (or tenant if opted that way) before it gets rolled out to your entire company or production tenant, which is a great feature and comes in handy when testing out new functionality or an upgraded UI. There are still some changes however that can have major impact on the UI of your SharePoint sites that are not pushed through the First Release function, nor are they communicated about in any way.
One such major UI changes occurred a few weeks ago, around the 25th of August 2015. Let me explain the scenario first, and then I’ll get into the details of the change (and how to fix it). We have several SharePoint Site collections that serve a different purpose. We have site collections that are meant purely for collaboration and contain team- and projectsites. Then we have site collections that are used for corporate communications, such as news, latest announcements, company history and vacancies, that kind of stuff. And lastly we have site collections meant for document management solutions. We opted to have as minimal customizations as possible, but we did want our end users to know which of the three intranet area’s they were currently visiting. We thought that theming (or Composed Looks) would be a great way of showing this. We created several color files and themes: blue; green and orange. The Suite bar would be the main way of determining which of the area you are visiting, and as an added bonus, it made communication about the new intranet a lot more clear (e.g. ‘Green’ received a major update today by allowing you to create your own team- and projectsites).
In came Microsoft and their forced updates. All of a sudden our themes were no longer applied to the Suite Bar. Everything else would still be visible, so links would still be a certain color and Page Titles were also still fully functional. The Suite Bar however was totally black, which is the default tenant setting. Our initial thought was that Microsoft must have had an update that contained a bug of some sort which is why this was no longer working. It wasn’t just for our own Themes, but the OOTB themes also no longer changed the Suite Bar color, so clearly something was going on. We opened up a premier support ticket and after a few days of investigating (for some reason they received lots of support calls about theming – geez, weird huh?) they replied the following:
“Due to a multitude of customers’ request we changed the behavior.
What it comes down to is that customers want to keep the Suite Navigation bar the same across Site Collections regardless if a Site Collection administrator or a user wants a different theme.
Mainly because they want to keep the ‘Company’ color”
Right. Okkaayyyy. It’s not a bug, it’s a feature! A non-communicated feature, which happened in our production tenant before it happened in our first release enabled test tenant. And it happened three days prior to going live with our ‘Blue’ intranet area, which was now no longer blue.
I can see the reasoning behind this ‘feature’. It does make sense to have one Office 365 company theme being pushed to your entire tenant, rather than let each site collection have their own color. I would have preferred it if they had gone about this a bit differently though. A few weeks prior to this change Microsoft added a new feature to the Company Profile – Theme section of Office 365:
Users can override a company theme in their Office 365 settings, but when this option is checked, those overrides are no longer valid. It would have made sense if they added a second check box here to ‘Prevent Site Collection administrators from overriding custom theming with their own theme’. That would enable tenant administrators to have control over the theming behavior, rather than the company theme being pushed down whether you like it or not. Alas, who knows, maybe Microsoft will add that second checkbox in the coming weeks or months.
Luckily there is still a way in which we can restyle the Suite Bar back to our ‘original’ color and that comes in the form of custom CSS styling. A few simple CSS lines will enforce the suite bar to turn back to the color of your choice. Using the CSS below, our Suite Bar turned back to an awesome shade of blue:
/* Fix the Office365 Suite bar */
.o365cs-base.o365cst .ms-bgc-tp,
.o365cs-base.o365cst .ms-bgc-tp-h:hover,
.o365cs-base.o365cst.ms-bgc-tp,
.o365cs-base.o365cst.o365cs-topnavBGColor-2,
.o365cs-base.o365cst .o365cs-topnavLinkBackground-2
{
background-color:#00a2bd!important;
}
I’m not a fan of !important – rather I try to avoid it at all times. However because the Suite Bar is loaded dynamically, it will reset back to black (or rather – the company profile theme color) if you don’t add it.
That’s it. You can add additional statements to this CSS to ensure the hover color is also set correctly, but in most cases this will be all. Simply add this CSS to any already referenced CSS file in your site collection. If you don’t have one yet, you can either use the Alternate CSS URL, or use CSS Injection techniques to make sure it is applied to every site within the site collection. In our case we already had a different CSS file for each section of the intranet, which were all referenced from a centralized location, so it wasn’t that much work. I can imagine however that if you have a multitude of site collections with a multitude of different Suite bar color, you have your work cut out for you. Oh well, I guess it’s not all peaches and cream being in Office 365 and having Microsoft manage a lot for you.
On the 6th of June I had the pleasure of presenting at the SharePoint Saturday NL event. It was the first time presenting for me, and I had a blast doing it.
Thanks everyone who attended! If you have any feedback I would love to hear it, either here or through twitter @vverbeek87.
Below you’ll find the slides used for the session:
On June 6th I have the pleasure of presenting at the annual SharePoint Saturday event in the Netherlands. This will be my very first time presenting at an event, so I am very much looking forward to it! Below you will find the outline of the session I’ll be presenting. Hope to see you there!
Introduction to developing remote event receivers (level 200 developer)
SharePoint 2013 introduced the concept of remote event receivers. These remote event receivers enable you to build apps that can tap into common SharePoint events and perform additional actions when they occur. But how do you build an app that utilizes remote event receivers and how can deploy your app to Azure?
This session will provide in depth knowledge on how to get started when developing remote event receivers. Aimed specifically at developers, we kick off with a brief introduction on the concept of remote event receivers. Using real-world examples, we’ll demonstrate the different possibilities for creating remote event receivers and explain the different kind of permissions your App needs in order to use remote event receivers. In the end you will learn how to deploy a remote event receiver to Azure.
When this session is over you’ll know all you need to know in order to get started building your own apps using the cool new capabilities that remote event receivers offer you!
This post was written with my colleague Cas van Iersel. You can find more of his blogposts on www.casvaniersel.com or you can follow him on twitter @casvaniersel
Since Microsoft has moved to a Cloud first approach with Office 365 some challenge came to light when it comes to the handling of events in SharePoint 2013 (Online). In the good ol’ days we would open up our Visual Studio and without hesitation write an awesome Event Receiver and deploy it as a Farm Solution. These days are over as we all well know. Microsoft now gives us a different set of Tools and Platforms to build these kind of Event Handlers called “Remote Event Receivers”. In this Post we would like to share some practical information to get started building these RERs quickly. But before we get technical first some ingredients to the RER recipe.
Skills: CSOM is the new SSOM
In case some of you missed the memo; the reason why programming in CSOM (Client Side Object Model) should be one of the Key Skills a modern SharePoint / Office developer should have is that we are NOT able to upload Farm Solutions into SharePoint Online. So the code that is going to handle a certain Event must be written in the CSOM. In this case the Managed CSOM .NET library.
Platform: Azure is not just a shade of Blue
So obviously here Azure is THE platform to host these kind of solutions. In order to get us started building a remote event receiver we are going to need an Azure environment. This is just a heads up, we will elaborate further on.
Tools: Visual Studio Power
The one tool you’re definitely going to need is Visual Studio. Microsoft Developers best friend. Besides Visual Studio most developers have their own preferences. Building RERs here’s a favorites list of tools that helped us build:
Fiddler
Azure SDK
OfficeDev Patterns & Practices (Okay, not really a tool, but nonetheless it is awesome)
My first RER
Skills: Check! Tools: Check! Azure Account: Not yet. No worries, we can start building RERs already without using Azure for now. Let’s start with opening Visual Studio shall we.
Creating a RER Project
We start by creating the right type of project: App for SharePoint. Then the app needs to be a Provider Hosted app and for the sake of Cloud I hooked it up with my Office 365 Tenant.
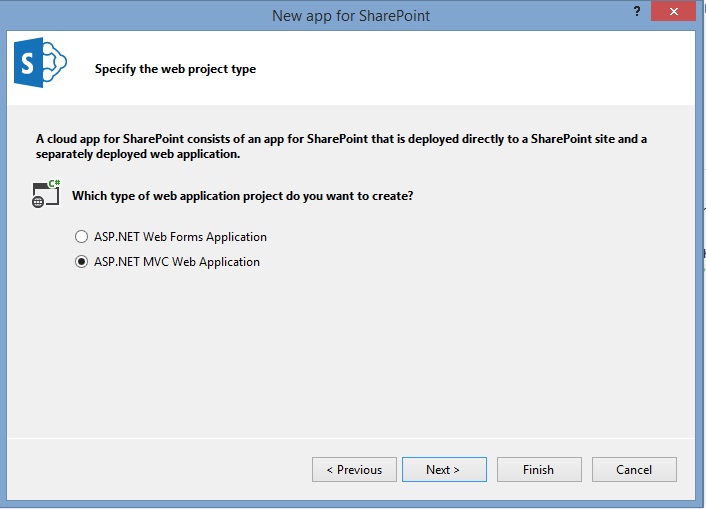
A RER is basically just a piece of code that runs whenever an event goes off. Now that doesn’t require a fancy UI or even a Front End. But because this code is wrapped inside a Provider Hosted App we need to choose a type of Front End web application. We choose MVC just because we like the MVC framework. The only reason we might actually need a UI is to work with settings for the App.
Click Next and select Azure to use for Access Control and click Finish. Visual Studio will create a nice Solution with 2 projects for the SharePoint hosted App.
The First Event
In order to hookup SharePoint events later on, first we need to enable the App Installed event. This event will enable us to execute code when the App is properly installed. That is the right moment to hookup all other events using code. Click on the App Project and observe the properties window. Change the “Handle App Installed” property to True. Automatically Visual Studio will create a service in de MVC application to handle this event.
We also want to remove the RER in case the app is deleted, so we’ll go ahead and enable ‘Handle App Uninstalling’ as well.
Handle It
The created AppEventReceiver contains a method called ‘ProcessEvent’. That method gets fired when the app is installed and that is the point where you can hookup your custom RER. Another option would be to add a button to your apps’ interface and perform actions on the button click. All App Events are handled through the same method, so it is important to distinct between them. Since we have two different events, installed and uninstalling, the ProcessEvent method might look something like this (the code provided here are taken from the OfficeDev PnP examples):
This file contains bidirectional Unicode text that may be interpreted or compiled differently than what appears below. To review, open the file in an editor that reveals hidden Unicode characters. Learn more about bidirectional Unicode characters
In this blog we’ll create a new list, and add a custom RER to that particular list. The creation of the list is demonstrated in the below image:
This file contains bidirectional Unicode text that may be interpreted or compiled differently than what appears below. To review, open the file in an editor that reveals hidden Unicode characters. Learn more about bidirectional Unicode characters
At this point we have a list that we want to add a custom RER definition to. This can of course also be done with an already existing list. All you need is a List object.
This file contains bidirectional Unicode text that may be interpreted or compiled differently than what appears below. To review, open the file in an editor that reveals hidden Unicode characters. Learn more about bidirectional Unicode characters
In the above code snippet, the RER Definition is created and the important properties are filled. First you specify the EventReceiverType. Next you have to specify the receiver URL or endpoint. Retrieving the WCF URL based on the current method execution is a smart way of finding the proper endpoint for your receiver URL, especially when deploying an app in multiple environments. You could also use web.config properties or something similar to that which you can defer from across the different environments.
Handle the actual RER execution
Similar to the App Installed and Uninstalling events, the RER also has a method that is called on execution, the ‘ProcessOneWayEvent’. You are responsible for filtering out the correct list or EventType that is being triggered, and based on that you can have your code do different things. The ProcessOneWayEvent can look like this:
This file contains bidirectional Unicode text that may be interpreted or compiled differently than what appears below. To review, open the file in an editor that reveals hidden Unicode characters. Learn more about bidirectional Unicode characters
In the HandleItemUpdated event you can retrieve the list and ListItem through the SPRemoteEventProperties and perform the required actions after that. That method can look something like this:
This file contains bidirectional Unicode text that may be interpreted or compiled differently than what appears below. To review, open the file in an editor that reveals hidden Unicode characters. Learn more about bidirectional Unicode characters
We don’t want to end up with RER’s that call out to non-existing endpoints. When a user removes the app, we’ll want to remote the associated Event Receivers that have been created during the app installed event. We’ve already enabled the handling of the AppUninstalling event, and hooked it up with a method ‘HandleAppUnInstall’. All that remains is filling this method with the removal of the RER. We do that by retrieving the list, and then retrieving any RER that match the specified name. If a RER has been found, we delete it. The code to achieve this, is shown below:
This file contains bidirectional Unicode text that may be interpreted or compiled differently than what appears below. To review, open the file in an editor that reveals hidden Unicode characters. Learn more about bidirectional Unicode characters
That’s it! You now have a working Provider Hosted App, that adds a RER to a list in your hostweb upon installation. The next step is moving to a production-ready environment, and deploying your App to Azure.
Deploy a Provider Hosted App to Azure
After you have created and tested your App with Remote Event Receivers, it is time to deploy it to Azure and make it available to other users as well. While you could also choose to host your app somewhere other than Azure, this blog focuses on Azure because that just makes so much more sense. Azure Web Apps are free to use, quick and easy to set up and configure, and takes away the hassle of creating an externally available SSL website by you (or your network team), because Azure does all this magic for you.
The first requirement is an actual Azure account. If you don’t have one yet, you can create a free trial for a month over on http://azure.microsoft.com/en-us/pricing/free-trial/. Everything demonstrated in this blog is included in the trial, and you can create up to 10 Azure Web Apps for free.
After you have created your Azure account, log in to the management portal (https://manage.windowsazure.com). Create a new Web App by clicking on the + icon in the lower left corner, choosing Compute –> web App –> Quick Create.
Choose a URL that describes your app and click on Create.
The next step is to register your app in SharePoint. You can do so by going to the page _layouts/15/appregnew.aspx. The app registration is a Tenant-wide administration, so it doesn’t really matter on which site you perform this registration.
You can generate a Client ID and Client Secret, and fill in a title that suits your app. For the app domain, pick the same URL as the one you created in step 2, but without the protocol. The redirect URI is the URL with the protocol included.
Depending on how you created your Remote Event Receivers, you’ll need to update the URL of the EventReceiver to point to Azure instead of your localhost. If you’ve created your RER through XML declaration, you’ll need to update that URL to also point to the URL from step 2. If you’re creating RER’s on the fly throughout your app, a good practice would be to have an App Setting in your web.config that contains the URL from step 2. Then, when creating the RER, you can read that app setting to dynamically hook up your RER to the proper deployment.
Azure actually also allows you to create App Settings that your Provider Hosted App can read. That way you can have a different App Setting per environment (Deployment / Test / Acceptance / Production) without having to change your code. In order to create an app setting in Azure, click on your newly created Web App and click on ‘Configure’ in the top navigation bar. Scroll down until you reach the App Setting section and insert/modify your desired app settings.
Update the web.config for the Web Project to include the new Client ID and Client Secret. When deploying locally, Visual Studio automatically updates these values for you. Since we’re deploying to Azure, Visual Studio won’t be able to update these values. You have two choices here and both are completely valid. You can choose to either include the Client ID and Client Secret in the App Settings directly in Azure, or you can add them to the web.config file. The choice is yours.
The final step before we can deploy our projects is to download the Publish Profile from Azure. Navigate to your Web App, and at the Dashboard you can click on the link to download the publish profile.
This publish profile can be used to deploy your visual studio project to Azure, directly from Visual Studio. You can download multiple publish profiles (for example, for the different environments) and hook them up to the same Visual Studio project. That way you can quickly deploy your project to different environments.
Now that we have all our prerequisites set up in both Azure and in our Visual Studio Solution, it is time to deploy the two projects. Right click the Web project and select Publish. In the popup window select ‘Import’ and choose the Publishing Profile you downloaded in the previous step.
Click finish and your Provider Hosted Web Project is now deployed to Azure. If you have multiple publish profiles, you can click on Publish again, return to the first screen of the dialog, and choose import again. The new profile will now be added to the list of available deployment locations, and you can easily switch between them.
The last step in the process is to deploy the SharePoint App. Right click the App project and select Publish. In the next screen select ‘Package the app’. A dialog window will ask you for two things:
Where is your website hosted? Enter the URL including the protocol you have created in step 2;
What is the app’s Client ID? Enter the Client ID you generated in step 3;
When the publish has been done successfully, the local folder containing your .app file should open. Upload this app file to the App Catalog site in the library ‘Apps for SharePoint’. You can then add the app through the Site Contents screen. Doing so will redirect you to the *.azurewebsites.net provider hosted app, where you can confirm your app works as expected. In case you get an error that ‘The assembly cannot be loaded’, and you didn’t get that error when developing against your localhost; that means Azure is missing some DLL’s (which will happen for instance if you have the Office Dev PNP included in your references). Open the provider hosted app and click on References. For each DLL included there, make sure the ‘Copy Local’ attribute has been set to true.
That’s it! Congratulations, you have now successfully deployed your Provider Hosted App to Azure. In the next paragraph we’ll show you how to debug your remote code after it’s been deployed to Azure.
Debug the app using Azure Servicebus capabilities
Now that we have the app deployed to Azure and it’s running in a test environment, what if you there are some bugs and you want to debug against that specific deployed code? Luckily, Microsoft has enabled us with a powerful tool that makes debugging an Azure app quite easy: the Azure Servicebus. Please note, the Servicebus does have additional pricing, which can be found here.
In order to debug your remote code, you can follow the steps below:
Log in to the Azure management portal to create a new Servicebus. Do this by clicking on ServiceBus in the left navigation and then click on Create at the center bottom of the screen. A window will pop up:
2. After the Servicebus namespace has been created, select it and click on the Connection Information icon at the bottom of the screen.Copy the connection string that is displayed there. It will look something like this:
3. Open the properties of your SharePoint App Project and click on the SharePoint tab. Scroll down until you find the information regarding Debugging. Check the box that says ‘Enable debugging via Microsoft Azure Service Bus’ and fill in the connection string from the previous step.
4. That’s it, you are now set to enable debugging through Microsoft Azure! To actually debug the code without having the press F5, you can also Attach a debugger on the fly. Do this by opening the Server Explorer in Visual Studio and adding a connection to your Microsoft Azure environment. That connect button looks like this:
After you have logged in with your account, open the Website section, right click your App and select ‘Attach debugger’.
Your debugger should now fire up and start debugging against the remote code. If you get the following warning:
You’ll need to disable the ‘Just My Code’ debugging feature. You can do this by clicking on debug in the Visual studio menu, and select ‘Options and Settings’. Under the Debugging tab, with subtab General you have a checkbox to enable Just My Code debugging. Uncheck that box and save the settings.
Everything should now be working as expected.
Summary
Congratulations! You have just created your first app containing Remote Event Receivers and deployed it to Azure! We’ve also shown you how to debug the code once it has been deployed to Azure. You now know everything in order to get started writing your own cool apps: the possibilities are endless!
For further information regarding RERs, be sure to also check out the OfficeDev Patterns & Practices section which you can find here. They have several working examples that not only show how to add your RER, but also have some kick ass implementations.
Lately I have been working with the OfficeDev Patterns & Practices samples a lot. The amount of quality examples provided in that project is amazing, and a huge thanks should go out to all that contributed. One of the components created in the Patterns & Practices is a client side people picker that can be used in Provider Hosted Apps. This component creates a people picker inputbox that closely resembles the one you get in OOTB SharePoint.
In this blog post I’ll guide you through the steps required to extend this component to be able to add a placeholder text that describes what the field’s value should contain, using the HTML5 placeholder attribute. This allows for a much nicer UX, and makes your client side people picker go from this:
To this:
Before we get down to business, it’s important to note that this post assumes you already have your client side people picker up and running, using the Core.PeoplePicker solution. You can find out how to do just that here.
The first step is to actually include the placeholder text in the input element. That part is relatively easy. The sample dictates a certain HTML structure, because the javascript file is dependent on that structure. You need a surrounding div, span element, input textbox, search area and a hidden field that ends up containing the actual selected people value. This structure is shown below:
This file contains bidirectional Unicode text that may be interpreted or compiled differently than what appears below. To review, open the file in an editor that reveals hidden Unicode characters. Learn more about bidirectional Unicode characters
In order to add the placeholder text, change the Width of the asp:Textbox to 155 (or a different value based on the length of your placeholder text), and add the attribute placeholder=”your placeholder text”. If you fire up the page, the initial result is exactly what you want. However, if you add a user, you want the placeholder text to disappear, and only adding the placeholder attribute doesn’t do that:
The reason it doesn’t hide the placeholder text is because the value for Test User 1 isn’t stored inside the input box, but rather inside the hidden field. And because the input box doesn’t have any value, the default behavior is to show the placeholder text.
In order to fix this, we’ll need to add a change event to the hidden field that stores the people picker value. In case the value is changed, we want to adjust the placeholder attribute on the input field accordingly. And secondly, we need to make sure the change event is fired when a user is added or deleted (default behavior for a hidden field is that value change events do not fire, because it’s not the user that executes the change, but rather the javascript).
To add a change event to the hidden field, you can include the following line of javascript in your $(document).ready function:
$(‘#hdnSiteOwner’).change(changeSiteOwnerPlaceholder);
The function that is executed on the value change is shown below:
This file contains bidirectional Unicode text that may be interpreted or compiled differently than what appears below. To review, open the file in an editor that reveals hidden Unicode characters. Learn more about bidirectional Unicode characters
It looks at the value for the hidden field. If the value does not equal ‘[]’ (which is the value set by the control in case a user is cleared out), a user has been selected and the placeholder text is emptied. If the value does equal ‘[]’, no user is selected and the placeholder text is restored.
The last step is to make sure the change() method gets executed when a user is selected or removed. To do that, we need to add several lines of code to the peoplepickercontrol.js file. The methods ‘RemoveResolvedUser’, ‘RecipientSelected’ and ‘DeleteProcessedUser’ need to have the following line included at the end:
this.PeoplePickerData.change();
Which makes the methods end up like this:
This file contains bidirectional Unicode text that may be interpreted or compiled differently than what appears below. To review, open the file in an editor that reveals hidden Unicode characters. Learn more about bidirectional Unicode characters
And that’s it! Now you have a fully functioning client side people picker with a placeholder text that is cleared after a user has been selected, and returns in case all users are cleared. Your end users will certainly appreciate the informative description that you have just added! Happy coding.
In a very large environment it is not uncommon to have Visual Studio solutions that contain multiple different projects. However, when you’re working with these individual projects, you want to be able to quickly debug your specific project. I recently discovered, that when you do this in a solution that contains a Provider Hosted App, switching to and from the Provider Hosted App for debugging purposes, has some very specific gotcha’s…
Let’s create an example to see what I mean. I create a new solution with a provider hosted app (ASP.Net Web Forms Application). After the solution has been created, I add an additional project. This time it’s a console application. The solution structure, still very basic, now looks like this:
Let’s say I’m going to work on the Console Application first. So I right click on the project and select ‘Set as startup project’. I hit F5, and the console app launches and everything is working great. The debugger is properly attached, and my breakpoints (if I’d have any) are properly hit.
Now the Console application is absolutely perfect, and I want to continue working on my Provider Hosted Application. This is where the trouble begins… Which project do I set as startup project? First let’s see what happens when I set the PHApp project as startup and hit F5. So far so good… Visual Studio installs my app in my SharePoint site, launches IE and reverts us back to the apps default page. However… None of the breakpoints set in my PHAppWeb projects are being hit. Sure, IIS Express launches the web and handles the execution, but not being able to debug through your code makes things quite difficult doesn’t it?!
Let’s see what happens when we set the PHAppWeb project as the StartUp project. I hit F5 once again, and great; my symbols have now been loaded! But wait… nothing else happens. Your default browser is not starting, and there is no way for us to reach the code unless we want to manually browse to the apps’ start page. That’s no good either!
So, what other choice do we have? The answer is in the solution properties. Right click on the solution and select ‘Properties’. In the ‘Startup project’ tab, you have the option to select multiple startup projects at once. So let’s select that option, and specify the PHAppWeb first with a ‘Start’ action, and the PHApp second, also with the Start action configured. The end result should look like this:
Now when we hit F5, the PHAppWeb is launched, symbols are loaded, and then the app is installed to SharePoint. Once that is done, the browser will start up and asks you to trust the app and then redirects to the apps’ start page. Exactly the way we want it to! Unfortunately, you’ll have to manually change this every time you set a different StartUp project.
So, in short, if for whatever reason your Provider Hosted debugging experience is a bit buggy, make sure to check the Solution Properties and check if both the AppWeb and the App project are configured with a ‘Start’ action. Gotcha!
In this blog post, I’ll show you how to easily retrieve a Yammer access token to use for demo purposes. Please note, the method showed here is purely meant as that; for demo purposes. In an actual production scenario, you can follow the steps found at https://developer.yammer.com/v1.0/docs/authentication-1 . If you’re just quickly looking for the access token, to demo the cool stuff you can do with the Yammer API, then this blog post is for you.
Create a new Yammer App In order to do any demo’ing at all, you’ll first need to register a new app. To do so, first go to https://developer.yammer.com/v1.0/docs/yammer-partners and click on ‘Register an App’. You’ll be redirected to a new page that shows all the apps you currently have. On the left side click ‘Register new app’. The following screen should appear:
You can fill in any values you like, but for the Redirection URL please fill in https://localhost. This will be what allows us to easily retrieve our access token.
After your app has been created, it is important to note that if you want to do any Javascript requests with your app, you should also white list the domain your app is using in the settings. To do so, after the app has been created, click on ‘Basic info’ on the left side of the screen:
Underneath the heading ‘Installation Information’ you have a field called ‘Javascript origins’ which is the field where you want to add your custom domain that you are using for those javascript calls. If you do not specify your domain here, your app will get blocked from performing any javascript calls. This is done for security reasons, so not everyone can ‘fake’ being your app from any domain out there.
Retrieving the Access Token for a particular demo user Now that we have our app registered at Yammer, we can actually retrieve the access token. This process is as simple as performing a GET request in the browser. We use the following structure:
For the client ID, specify your app’s client ID that you just created. You can find that by clicking on the name of your app in the left menu on yammer. For the redirect URL we can use the value specified as ‘Expected redirect’. Your final URL would be something like
If you’ve done everything properly, Yammer should now ask for your user credentials. The access token given will be based off of these credentials. Fill in your credentials and you’ll be redirected to your Expected Redirect URL. Although this will not actually work, since your localhost is not configured to do anything with this information yet. You will however be able to retrieve the code that is required for the next and final step. In the address bar, take note of the code given. For the last step in this process, create a URL as structured below:
You already know where to find the values for clientId and clientSecret, and you’ve just found the code. Now go to this address in the browser and you’ll be able to download a json object. This object contains the actual access token. You can find it by opening the json file in your prefered development program and looking for the keyword ‘Token’. The value after the : will be the value you want. You can then use that Bearer access token in your custom application to perform Yammer API calls. And since the access token actually does not expire for quite some time, you’ll good to go! Happy coding!
SharePoint online allows you to create a Public Facing Website (atleast, until March 2017 for existing customers, read more). Although the public website has some limitations, there are still some pretty cool things you can do with it.
For a customer of ours, I have implemented a responsive design using the Public Facing Website. I used the default corev15 styling css, and added an additional css file to do all the custom styling. When testing the website on different devices though, I came across a strange bug. For all iOS devices, the vertical scrolling was ‘groggy’, or simply very very slow. This resulted in a poor user experience, especially for pages which had quite a bit of content.
Turns out there is a pretty easy fix for this. In the corev15 the basic scrolling is implemented in two different css statements, as shown below:
body
{
overflow:hidden;
}
and
#s4-workspace
{
overflow:auto;
}
If you want to fix this annoying bug, you can simply add ‘-webkit-overflow-scrolling: touch;’ to the #s4-workspace css rule. Tada, scrolling is now as you would expect it to be in the first place. Gotcha!
If you’re not using a custom masterpage or CSS file, you can simply add the CSS markup by clicking on ‘Site’ and ‘Edit style sheet’ from the ribbon. Add the markup below:
Whenever you create an app, you have to think carefully about the permissions that the app needs on order to function correctly. Some apps can execute actions based on the permissions that the user has, but for other apps the app needs its own set of permissions. That is the case for example when you are working with remote event receivers in a provider hosted app.
When it relates to content creation, an app can request four different sets of permissions:
Read; (which corresponds to the default Reader permission level)
Write; (which corresponds to the default Contributer permission level)
Manage; (which corresponds to the default Designer permission level)
FullControl; (which corresponds to the default Full Control permission level)
These four different sets of permissions can be requested in one of four scopes:
List;
Web;
Site Collection;
Tenant;
It is important to note that whenever your app requests the ‘FullControl’ permission set, that particular app cannot be uploaded to the SharePoint Store.
During the development of your app you might have to switch the permission level that your app requires. On MSDN Microsoft explains how to change the apps permissions after it has already been installed. You can do so by navigating to http://<yoursharepointsite>/_layouts/15/AppInv.aspx , enter the app’s ID and update the XML related to the permission request. However, recently I found out that this in fact does not work in all cases. In one of our apps we used remote event receivers to create a new subweb, which requires the FullControl permission level. Currently we only had the Manage permission, so we had to change that. Updating the app and then re-trusting it unfortunately still resulted in a ‘You do not have the required permissions for performing that action’ error.
Following the above mentioned steps for updating our apps permissions also did not work. In fact, the only way to get the new permissions working properly, was to delete the entire app and then install it again. After that our new subwebs were properly created.
In short; there appears to be a bug in updating the permission request when developing your app and deploying it in an Office 365 developer site. In order to get the new permission request functioning properly, remove the app from your site and reinstall it. Gotcha!
The new SharePoint Api is a powerful thing. It lets you query for items by using REST. However, there is an important thing to note when you are querying items using a SPQuery combined with a taxonomy field filter. Considering you have a taxonomy field that is named ‘CategoryField’ which contains the different categories for certain pages. You would expect the method below to work properly:
This file contains bidirectional Unicode text that may be interpreted or compiled differently than what appears below. To review, open the file in an editor that reveals hidden Unicode characters. Learn more about bidirectional Unicode characters
However, when you execute this function, the data returned is empty! It turns out that the field you use in your SPQuery has to be the hidden field that actually stores the content of your taxonomy field. So in the above method, change the FieldRef Name=’CategoryField’ to FieldRef Name=’CategoryTaxHTField0’ and try to execute it again. This time, the method will work and you get some functional data back that you can actually use. By the way, did you notice that &$expand=File&$select=Title,File/ServerRelativeUrl bit? More on that later…